Mini Mushroom Cross Stitch Pattern for Cards and Tags
An original tiny toadstool with a spotted red cap, shaded stem and tufts of grass, plus how to mount mini designs on greeting cards and gift tags.
At a glance
Materials
- 14-count sky blue Aida with 2 to 3 in (5 to 8 cm) spare on each side of the design
- Size 24 tapestry needle
- Stranded cotton floss in cap red, deep red, white, tan and grass green
- Small sharp scissors
- Aperture card or card stock and double-sided tape for finishing, optional
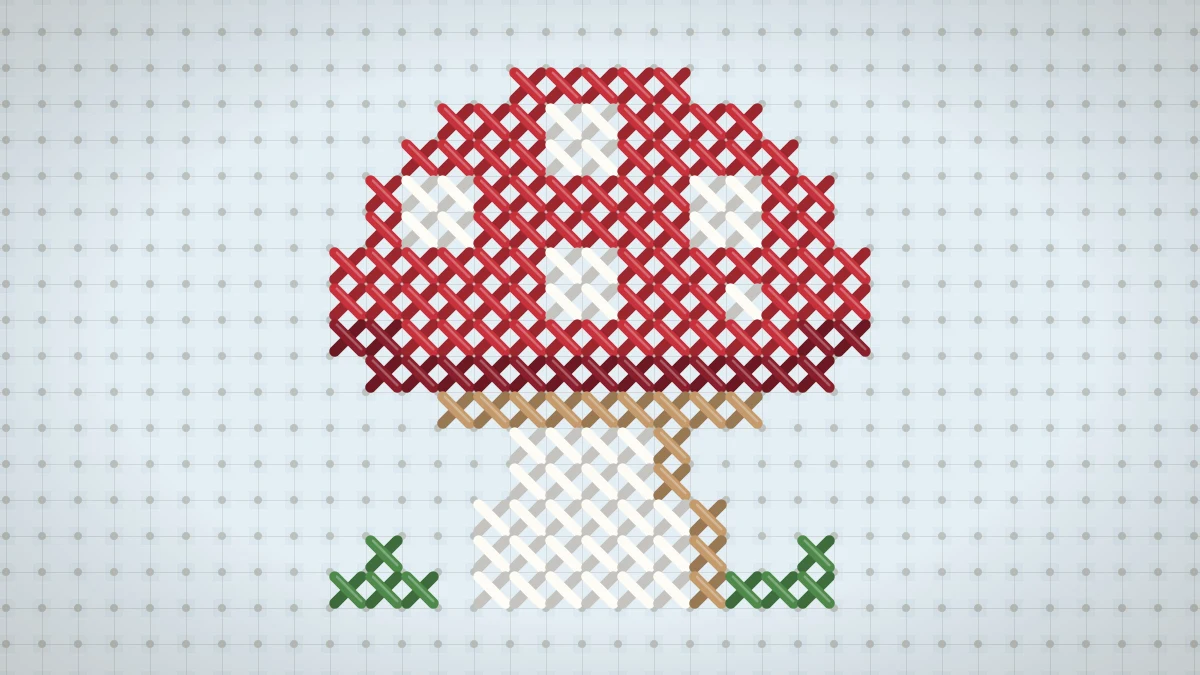
A red cap with white spots is one of the most recognizable shapes in pixel art, which makes it a natural subject for a tiny chart. This mini mushroom cross stitch pattern is an original design of 15 x 15 stitches: a spotted toadstool with a pale stem, a shaded underside and two tufts of grass. It is small enough to finish in a sitting or two and simple enough for a first project, and it is sized to sit inside a greeting card window or on a gift tag.
About the Design
The mushroom is built from 157 full cross stitches in 5 colors. There is no backstitch and no fractional stitch. Three choices in the drawing do most of the work of making it read clearly at such a small size:
- A dark rim. The lowest edge of the cap is stitched in a deeper red, which makes the cap look domed instead of flat.
- A row of tan gills. One row of tan sits directly under the cap and separates the red from the white stem.
- A shaded stem. A single column of tan runs down the right side of the stem, so the white keeps a visible edge.
The chart is drawn on sky blue fabric because white floss needs a colored background to show. Notes on stitching it on white or cream Aida are further down.
The Chart
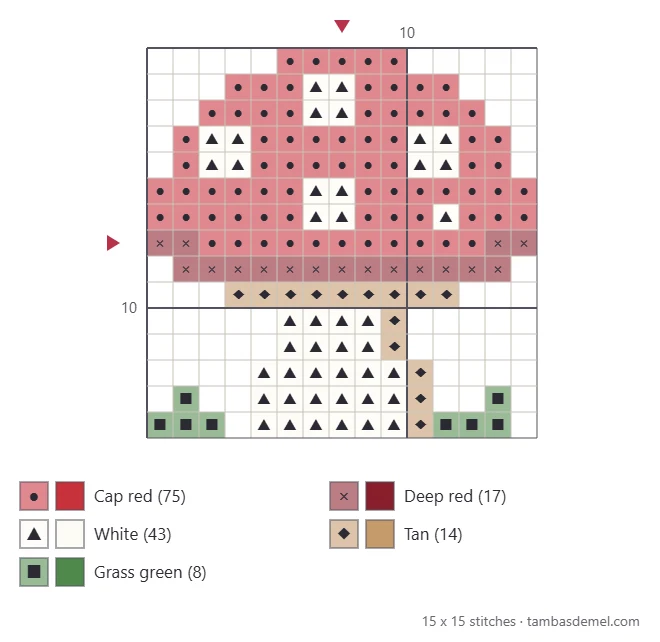
Every square is one cross stitch over one Aida block. The arrows at the top and side mark the center lines, and where they cross is the middle of the design. For a refresher on symbols and keys, see how to read a cross stitch chart.
| Symbol | Color | Stitches |
|---|---|---|
| ● | Cap red | 75 |
| × | Deep red | 17 |
| ▲ | White | 43 |
| ◆ | Tan | 14 |
| ■ | Grass green | 8 |
Match the colors from your own stash by eye. The two reds need to be clearly different: a bright, warm red for the cap and a deeper, darker red for the rim. The tan should be a soft light brown, darker than the white but much lighter than the reds.
Finished Size
On 14-count Aida the mushroom measures 1.1 x 1.1 in (2.8 x 2.8 cm). The table shows the size on other counts, with a suggested piece of fabric to cut for each.
| Aida | Finished design | Fabric to cut (3 in spare per side) |
|---|---|---|
| 11-count | 1.4 x 1.4 in (3.6 x 3.6 cm) | 7.5 x 7.5 in (19.1 x 19.1 cm) |
| 14-count | 1.1 x 1.1 in (2.8 x 2.8 cm) | 7.5 x 7.5 in (19.1 x 19.1 cm) |
| 16-count | 0.9 x 0.9 in (2.3 x 2.3 cm) | 7 x 7 in (17.8 x 17.8 cm) |
| 18-count | 0.8 x 0.8 in (2 x 2 cm) | 7 x 7 in (17.8 x 17.8 cm) |
The count changes the look as well as the size. A lower count gives a bolder, chunkier mushroom; a higher count gives a finer, daintier one. The Aida fabric guide compares the counts side by side.
What You Need
For 14-count fabric, use two strands of stranded cotton and a size 24 tapestry needle. On 11-count, switch to three strands and a size 22 needle. On 16-count, keep two strands and use a size 26 needle. Cut working lengths of about 18 in (45 cm).
White floss on a colored fabric sometimes looks thin, with the fabric color showing between the legs of each cross. If that happens, lay the two strands flat and side by side as you pull each stitch through instead of letting them twist together. Flat strands cover more of the block.
Stitching the Mushroom Step by Step
- Prepare the fabric. Cut it with 2 to 3 in (5 to 8 cm) of spare cloth on every side. Fold it in half both ways and mark the center.
- Stitch the bright red of the cap. Start from the center and work the cap in horizontal rows, skipping the squares marked for the white spots. The top row of the cap is the shortest and the rows widen as they go down.
- Add the dark red rim. The rim is one long row across the bottom of the cap, plus two stitches at each end of the row above it, where the cap curls under.
- Fill the white spots. Four of the spots are two-by-two squares and one is a single stitch on the right side of the cap.
- Stitch the tan gills. This is the single row directly beneath the dark rim. It is narrower than the cap and wider than the stem.
- Work the stem. Stitch the white first, then the tan column down its right edge. The stem widens by one square on each side toward the base.
- Finish with the grass. The green tufts sit on the bottom two rows, to the left and right of the stem.
End every thread by running it under three or four stitches on the back, then trim close. No knots are needed anywhere.
Watch out
Dark thread carried behind white stitches can show through as a shadow. Finish the red completely and secure its ends under red stitches before you begin the white spots.
Stitching on White or Cream Fabric
On white, cream or oatmeal Aida the white floss has nothing to stand against. Two simple changes solve that:
- Replace the white with a warm cream or pale beige for the stem, and keep the tan column as its shadow.
- Leave the spots as they are if the fabric is oatmeal, or stitch them in the same cream as the stem on white fabric.
Another option is to outline the stem in a single strand of tan or brown after the crosses are complete. The method is covered in backstitch in cross stitch.
Using Mini Designs on Cards and Tags
Small motifs like this one are most often finished as cards and tags, and both are quick to make.
Aperture cards
An aperture card is a folded card with a window cut in the front panel. Choose or cut a window that leaves at least three or four empty squares of fabric visible on every side of the stitching, so the mushroom does not look crowded. Trim the Aida a little smaller than the card front, fix it behind the window with double-sided tape, and check from the front that the design is centered and the fabric rows run level with the window edge before pressing it down.
Gift tags
For a tag, trim the fabric to a rectangle with about five squares of margin around the design and glue it to a slightly larger piece of card stock. Punch a hole in the card above the fabric and thread it with string. Pulling out the outermost one or two fabric threads on each side before gluing leaves a short, soft fringe.
Tip
Press the finished stitching face down on a folded towel before mounting it. The towel cushions the stitches so they stay raised while the fabric dries flat.
Other small finishes
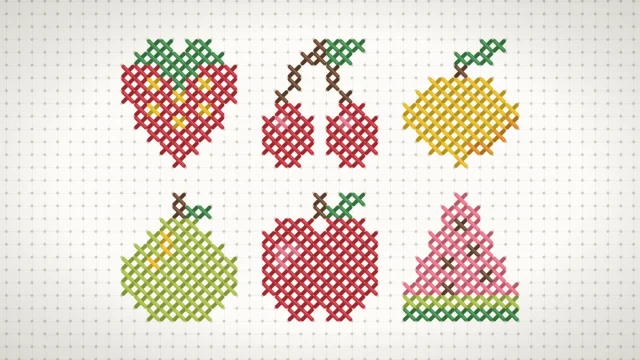
The mushroom also suits a very small hoop, the lid of a trinket box, or the corner of a larger woodland sampler. It mixes easily with the nine designs in the mini cross stitch motifs set and the six in the mini fruit patterns, which are drawn at a similar scale.
Color Variations
The same chart makes a whole patch of mushrooms if you change the cap colors and keep everything else the same.
| Cap | Rim | Spots |
|---|---|---|
| Honey gold | Chestnut brown | Cream |
| Soft brown | Dark brown | Tan |
| Teal | Deep teal | White |
| Dusty pink | Deep rose | White |
For each variation, keep the rule that makes the original work: the rim is a darker version of the cap, and the spots are much lighter than both.
Frequently asked questions
Is the mini mushroom suitable for a first cross stitch project?
Yes. It uses only full cross stitches and five colors, and the largest area, the red cap, is worked in simple horizontal rows. The white spots are small blocks that are easy to count from the stitches around them.
Why is the chart shown on blue fabric?
The spots and stem are white, and white thread cannot be seen on white fabric. A colored background such as sky blue or sage lets the white show clearly. On white or cream Aida, swap the white for cream or beige.
What size card window does a mini design need?
Pick a window that leaves a few empty squares of fabric visible all around the stitching. Measure your finished piece first, since the size depends on the fabric count, then add that margin on every side.